|
Miscellaneous notes/tips on
finishing kits:
Do NOT force weights into holes. If there
by chance is some sprue/flashing on the lead it must be removed
before insertion.
Salty's is not responsible for cracked lure
bodies due to improper assembly/care taken during assembly-these
are kits.. made on high precision cnc equipment but sometimes
poured things like lead don't fit perfect-it is your responsibility to properly
assemble kits. Ya can't fit a square peg in a round hole :)
We provide you with the basic raw materials
and
pictorials to aid in assembly.
Finishing: There are many ways to finish a
lure. We highly recommend you dip your lures in something to
waterproof them.
Thompson's waterseal will not work and anything
with wax in it is not recommended-We recommend
either Tung Oil, Shellac, Spar Urethane, Val-oil, Boiled Linseed Oil cut with mineral spirits, or any kind of lacquer sanding sealer will also
work with multiple dips may be required-let dry properly after
each step.. if you don't your paint/clear is likely to not stick
properly. Minwax makes a good lacquer sealer in a black can,
products such as Waterlox, Floor sealers, etc. Use appropriate
cautions when working with these items. Out of all the different methods for a home based
person to safely use I think the Minwax sanding sealer or spar
varnish with
multiple dips between drying is one of
the best options. You can find this at HD, Lowes, hardware
stores, etc. Salty's now has a line of lure paints which can be
used not only as a dip sealer, primer, finish coat, but it's
engineered specifically for fishing lures and arrow shafts. More
information is located in our free lure forum and on the website
HERE
.
After you seal your lures you need to
prime them. Try to use a color close to your base coat.
White/light lures should have white primer for highest color
clarity. Lures meant to be dark are best primed grey or black. Bin
spray primer in the red can is alcohol based and dries quickly.
This stuff will stick to just about anything. Just make sure
it's compatible with your paint. Try to stick to similar brands
of paint. Dissimilar and even some like branded paints can be
incompatible due to elements like aluminum etc in the paint. Bin is available at HD, Lowes, your local hardware
store etc also. If using Salty's lure paint our Supercoat can be
used as a sealer and a top coat!
Bin also makes a thicker oil based primer in a white/gold can
this works well also but takes additional time to dry.
If you plan on using a solvent type of paint then you should
have a solvent primer underneath to avoid incompatibility
problems.
Stick with same brand paints such as Painters touch, Rustoleum,
Krylon, etc, do not mix.
It is up to you to determine compatibilities. Salty's is not
liable in any way for coatings issues.
Paint can be
Salty's Lure paint, Spray cans, Testors model
paints, Createx T shirt
paint, Acrylic paints from AC Moore and other craft stores, Enamels with a
brush, etc.
It's up to you how fancy you want to make them!
As with all paints, coats are best applied thinly. Too thick
will cause crackling, or bubbling in most cases.
Be very careful
applying a solvent based coating over a water based. Many water
based paints can't take acetone-it causes them to lift/bubble.
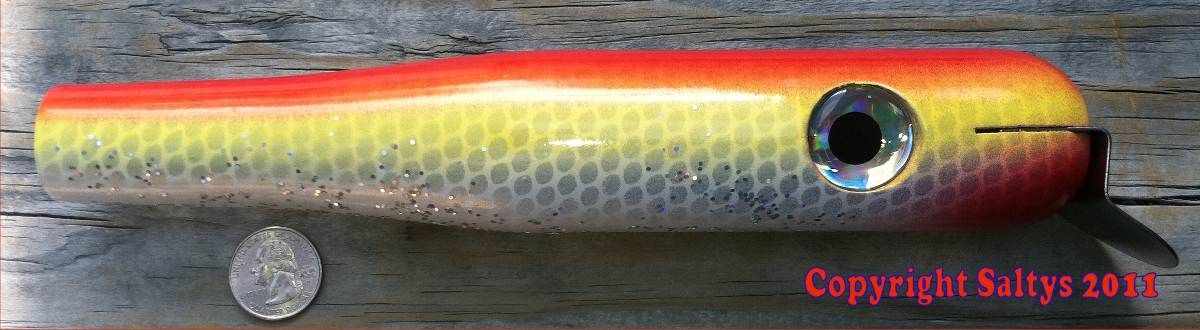
We sell the scale netting on the site in
the plug building section for making the scales on the sides of
your lures.
Clip over your
lure kit and lightly spray silver etc through the mesh. Let dry and remove.
Not necessary but some think it improves their hookup rate
because it looks more realistic.
We
recommend you topcoat your lure kits with either a thin coat of
Devcon 30 minute epoxy, several coats of spar varnish, multi coats of
Krylon etc clear in a spray can, or some of the
new water based polyurethanes can work well also! Remember to use the
same brand of paints throughout to eliminate adhesion issues! KBS Diamond finish makes a great one part brush on finish but
use outdoors or in a well ventilated area. Can have storage
problems also as it's a moisture cured urethane..
Salty's
Supercoat makes a tough chip resistant top-coat.
Basically the order in which you want to
finish the kits is to dip seal them, prime, base coat (white or
black), color coat, clear coat, final assembly.
Lips, grommets, weights ,etc can be glued
in with 30 minute epoxy, or any expanding polyurethane glue will
work also (sparingly).
One tube of 30 minute epoxy can assemble
many lures-eyes, lips, grommets, weights, etc, and give you a
great clear coat when "drawn" across the lure using an acid
brush found in your local hardware store plumbing dept (or we
sell the good one's on the site here under the plug building
section). Cut the
bristles short and it will allow you to get a thin coat which
looks great and lasts well. We have the bristle brushes also in
our online store under the lure parts section.
If kids are doing the work remember to use
proper precautions-rubber gloves are a good idea when working
with glues, safety glasses if re-drilling through holes, etc.
Always use proper ventilation and follow manufacturers
directions!
It is normal to have to re-drill weights
on some kits to get the wire through. We recommend a 1/8"
extended bit in a battery drill. Use care!
COMMON SENSE PREVAILS! SAFETY FIRST!
It is your decision on how you want to
finish them, and we will not make recommendations beyond what
you see here.
It's what works for you!
I don't wish to have people be unhappy with something because it
didn't work for them and I recommended it.
If you have questions, register and
ask on our lure forum!
This forum has alot of people that make
these kits on it!
It's free!
 |


